Poster Experimentation - Part 1 - 3D Anaglyph - 17.03.23
For this experiment, I randomly came up with the idea of doing a 3D anaglyph during a run-through of the screen printing process. I would think that it would be an excellent idea to combine both a 3D anaglyph and screen printing to see if the 3D effect would work when using screen printing.
I experimented with a regular photo first to see if the 3D effect would be the right thing to do with this project.
I also think that just having a black-and-white photo with the red and blue needed for the 3D anaglyph would look abstract and original as well.
I started out first by trying to create a 3D effect using photoshop, which worked surprisingly well using the technique found on Adobe's website, which is linked here;
https://www.adobe.com/creativecloud/photography/hub/guides/3d-anaglyph-photoshop
The photos below show the before and after the use of the guide. I also had to manually adjust the perspective due to showing double vision when creating the 3D effect.

I also found another tutorial that uses different techniques to experiment with. The first technique requires me to take 2 photos slightly apart and then create the anaglyph, whilst the second technique required more photoshopping to create a displacement map for depth.
The YouTube Tutorial is shown here
https://www.youtube.com/watch?v=C50IRg_ZE7o
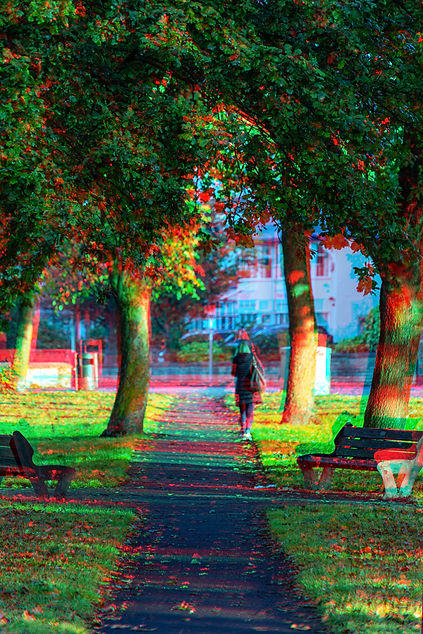
I used the displacement method of creating the 3D effect as I did not have another photo that was taken at the same location at the same time. The outcome from before and after is shown below;


As you can also see, I have added some test graphics on top of the image to see if those elements would add to the effect of popping out of the page when using 3D glasses, which it does.
I then proceeded to ask my lecturers about the chance of being able to screen print this and talked to them about changing the image mode from RGB to CMYK and then getting CMYK values into different individual channels ready to screen print. Photoshop can do this automatically by changing the image mode from RGB to CMYK. The individual channels can be selected in the channels tab and thus, being able to save the different channels needed to create the red and blue outlines shown in the test image.
The different screen prints were then printed out and given to the lab technician so that I can see if the use of different CMYK channels and bitmap worked and to see if the whole idea works as well.